Hostas are a pillar of the shade garden and can thrive for years, if not decades, with little care. When given enough water, essential for growing hostas, the plants will proliferate and form attractive clumps that, depending on the variety, can grow as large as six feet across.
When it comes time to transplant a hosta, this trait of permanence can present a problem. You might need to dig, divide, and move a hosta for several reasons, such as when the plants have outgrown their current location, when a new patio is being installed, or when you’re moving and don’t want to leave a lovely variety behind. What happens if you begin to remove a plant that has spent time in the same location for years?
You don’t need to panic. I’ll walk you through the entire process in this article and offer some useful advice to help you succeed.
Types Of Hostas

Hostas also come in various green hues, ranging from emerald to chartreuse, blue-green to avocado, and artichoke to olive. However, not all hostas are green; some prefer butter, yellow, gold, powder blue, cream, or white. Others are variegated, bordered, or striped in a variety of colors.
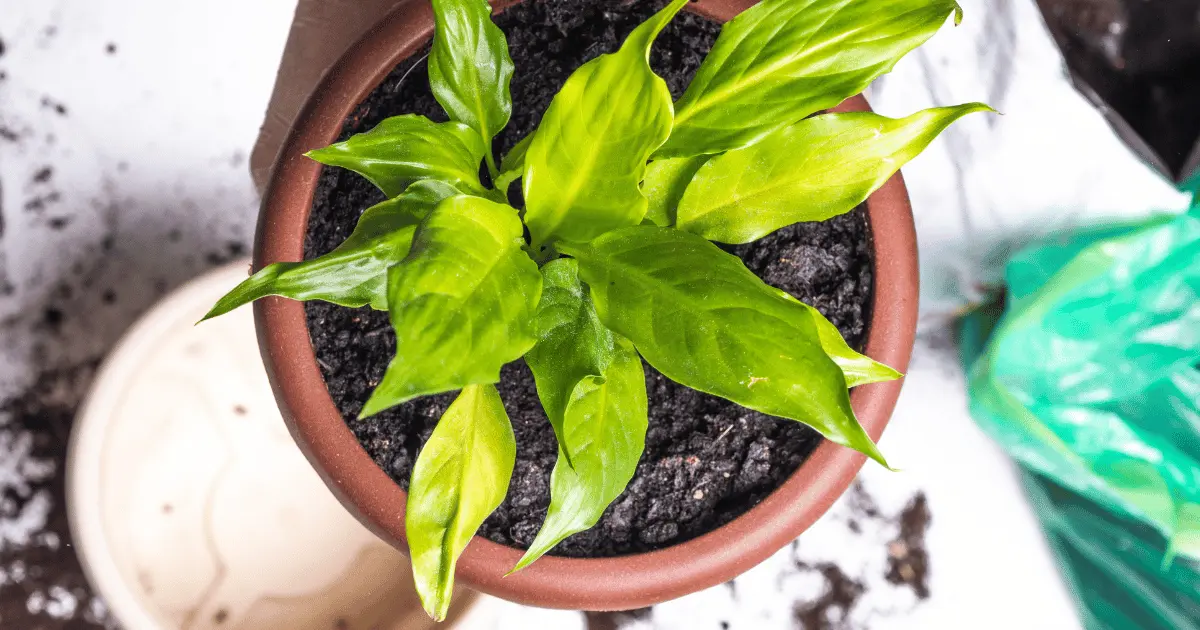
The textures, shapes, and sizes of leaves vary from plant to plant, making it possible – and enjoyable – to collect dozens of different species or selections. Look for crinkled, smooth, wavy, puckered, or concave leaf surfaces.
The leaves can be heart-shaped, elongated, oval, or rounded. Hosta leaves grow symmetrically, forming mounds of foliage ranging from 3 inches tall for dwarf varieties to 5 feet tall for giant types.
When To Transplant Hostas
Fall is the ideal season for hosta transplants because the air is cooler and the soil is warmer. Hostas have finished active growth for the season and are preparing for winter dormancy in late September.
Even if you rip a leaf or two while digging up a hosta in the fall, the plant will still look lovely because new leaves will grow in the spring. When the roots of hostas are disturbed in the autumn months, they have a window of time to recover and adjust to their new home before the ground freezes.
Begin by digging a planting hole in your new location. Then, dig a wide circle around the plant’s base, keeping the clump together. At this point, the hosta can be divided into smaller pieces or transplanted whole to the new location. Set the clump into the planting hole with care. After transplanting, gently backfill with the soil from the planting hole and thoroughly water.
How Can I Transplant Hostas
Hostas can be easily moved to a new location. While these plants are slow to establish, they are also resistant to the root disturbance caused by transplanting. As a result, transplanting hostas is an excellent way to fill in gaps in your garden or relocate them to a better location. Do you have any gaps in your landscape that need to be filled? If this is the case, hostas can be ideal for the job. Getting free plants for your space is as simple as separating old and large hosta plants. The trick is to know how to divide and transplant hostas correctly. If done correctly, you can enjoy a lovely yard for many years. So, how do you transplant hostas successfully?
1. Prepare New Location For Plant
Before removing the hosta from its current location, you must first prepare the new planting hole. You don’t want the plant to float around in the yard like a fish out of water, exposing its roots to sunlight. Don’t go overboard when adding the compost or leaf mold; just a few shovels will do: the hosta needs to acclimate and thrive in its native soil. Dig a hole twice the width and twice the depth of the root system. Make certain that the soil is well-tilled and nutrient-rich. They also thrive in rich organic soil that drains well.
2. Dig Up The Entire Root Ball
To make digging easier, choose a cloudy day after it has rained or water the plant. When digging up the hosta to divide or transplant, carefully remove the entire root ball. This could imply digging 18 inches around the plant to ensure you aren’t damaging or severing any roots.
Begin digging carefully, making sure to remove the entire root system. Make a large circular hole around the hosta plant’s base. Hosta roots typically extend as far as the foliage (or even further). If the hosta size allows, try to dig out the entire plant at once.
Larger hostas may have a basal clump too big to dig up and transplant by hand.
Lift the hosta root ball carefully out of the original hole. Avoid disturbing the roots (although hostas are tolerant of root disturbance).
3. Mildly Clean the Roots
After removing the root system and plant, gently shake or wash away any dirt from the roots. This will give them a fresh start when replanted and give you an idea of what you are dealing with.
4. Separate/Divide the Hostas
Consider splitting the plant if it is large and mature. Simply divide the plant into more manageable pieces with your spade.
You can now begin to separate the plants. You will notice that they will naturally separate from one another. Pull the plants apart gently to divide them, and take care not to disrupt the roots in any way. If your hosta clump is difficult to separate by hand, you can cut it up with a sharp spade or knife.
5. Keep Plants Cool
Keep the plants in a cool place while you clean the roots and separate them. You can also mist the roots with cool water if desired. Do not leave them sitting out in the sun. You’ll want to move quickly to get them back into the ground as soon as possible. Plants should never be uprooted and left for a day or two before planting. You should only uproot plants if you can divide and replant them on the same day.
6. Move The Hostas To New Location
Transfer the soil clump to its new planting location using a wheelbarrow, garden cart, or other modes of transportation.
Fill the prepared planting hole with the soil clump. You can add some water to the hole before adding the plant. The soil around the planting hole should be at the same elevation as the soil at the base of the hosta. If necessary, adjust the depth of the planting hole so that the hosta is not planted too deep or too high in relation to the garden bed around it.
Backfill the hole carefully, filling any voids with soil and avoiding large gaps in the ground.
7. Water Well and Add Mulch
Once planted, water the new plant thoroughly and feed it with a slow-release liquid fertilizer. Water the hosta thoroughly after transplanting and regularly for several weeks or months after the move. Keep an eye on the new plant over the next few weeks. Make certain that the soil remains moist and that the area is pest-free. Slug traps may be useful at this time of year because slugs adore hostas and will feed on them if not protected.
Spread a two- to three-inch layer of mulch around the planting area to keep the soil moist and weeds at bay. Make sure the mulch does not come into contact with the plant stems.
How To Care For Hostas After Transplanting

Hostas originated in China, Japan, and the South Korean islands. These magnificent foliage plants thrive in rich, well-drained soils.
Most hostas prefer shade, but some prefer sun, so read plant labels and select varieties that prefer the growing conditions you can provide. Blue hostas generally have richer color in shady areas, whereas gold hostas require more sun to show their brightest hues.
Hostas require average watering but benefit most from watering during dry spells. Water them more frequently if planted beneath trees competing for water and nutrients.
Avoid overwatering, which can cause the plants to rot. You should suspect crown rot if you notice yellow foliage and stunted growth.
FAQs
Which month is ideal for transplanting hostas?
The best time to transplant hostas is early fall because the soil is still warm from the long summer days and will encourage rapid root growth. Spring transplanting is also appropriate as long as you wait until the soil has warmed up a little.
Why are my newly transplanted hostas wilting?
Transplant shock may be the cause of a wilted, limp-appearing hosta plant that has recently been replanted or moved into the garden. This is what? This occurs when damage sustained during transplantation prevents the roots from properly absorbing water and nutrients.
How often should hostas be watered after transplanting?
Hostas that have just been planted require daily watering for the first two weeks. Once they have become established, small or medium plants will require a good soak once a week. Hostas can withstand droughts but prefer moist, well-drained soil. Increase watering to three times weekly in hotter weather.
Water the transplanted hostas thoroughly, especially if they were divided during the transplanting process. Maintain vigilance over them for the first few weeks, and water them more frequently if the weather is hot and dry. Some hosta leaves commonly turn yellow after transplanting. Leave them on the plant or trim them back to the plant’s base if you don’t like their appearance.
After transplanting, mulch the soil around the base of the hostas. Compost, pine needles, rotted manure, and shredded leaves are all good organic mulch options. While munching, keep the mulch away from the plant’s base, as this can trap moisture against the stems and invite fungal disease.