Begonias are a classic favorite amongst professional gardeners and people who see gardening as a hobby. Looking at their luscious blooms and foliage unique to them, what is there not to love?
It doesn’t matter whether you have a begonia for its flowers or foliage. There is at least one type to suit every houseplant collector.
Asides from their alluring beauty, begonias are very tolerant plants. They are fun to grow both indoors and out, and collecting them can get addictive.
If you want to expand your collection or gift someone dear to you, don’t fret. Begonias are super easy to propagate, so keep reading to know how to turn your one plant into many.
Tools for Propagating Begonias
Every project needs a set of tools to be successful. This principle is also applicable to gardening.
I can’t go to water my plants without my watering can, just as you won’t prune your plants without a pair of shears or pruners.
Anyways, here is a list of items you must have before propagating your begonia.
Plant Shears

The first tool you’ll need for this process is a pair of shears. You’ll want to look out for rust or chips on the blades.
If they are too damaged, they cannot be of any use. Using blunt shears may damage the plant tissue by mangling the plant.
You can substitute for a fresh razor blade. Also, make sure always to sanitize these objects before use.
Failure to do so might introduce unwanted pathogens to both the old and the newly propagated plant, bringing on a host of problems you don’t want to deal with.
Begonia Cuttings
This is an essential part of this whole exercise. Although you can use seeds as a means of propagation, using cuttings is much faster.
There are different types of begonias, so there are different cuttings. They are stem cuttings, leaf cuttings, and rhizome cuttings. More on this to come later.
Water Vessels
This vessel is for the water propagation method. If you choose this method, you’ll need something to put your cutting in.
Most people prefer to use clear glasses, but you can use anything you have on the ground.
Make sure whatever you choose can be cleaned easily and refilled with water. Also, check that it has enough room to remove the cutting after the roots have grown.
Planter

Try to get a planter with good drainage and enough room for a solid root system to grow.
A three to four-inch pot would be sufficient. You can also use a planting tray.
Soil

Whether you’re going with the soil propagation or water propagation method, you’ll need an appropriate potting mixture at some point.
You can use a mixture of perlite, vermiculite, peat moss, or coco husk. Whatever you decide to use, make sure it is light, airy, and well-draining.
Rooting Hormone
Using a rooting hormone is optional, but it can greatly increase the chances of success of this propagation.
This stuff can come in handy in powder and liquid form, especially for slow-growing plants.
Plant Tags

This is used to label your cuttings, especially if you have more than one, so you don’t mix them up.
Also, you can use them to note when the cuttings were taken so you can monitor their growth to see if they are taking too long.
How to Take Begonia Cuttings
As I mentioned earlier, different types of cuttings are taken for the different types of begonias, and they would need to be propagated differently.
Stem Cuttings
Taking stem cutting is possibly the most popular method of plant propagation. Many houseplant begonias have cane-like stems that the leaf grows from.
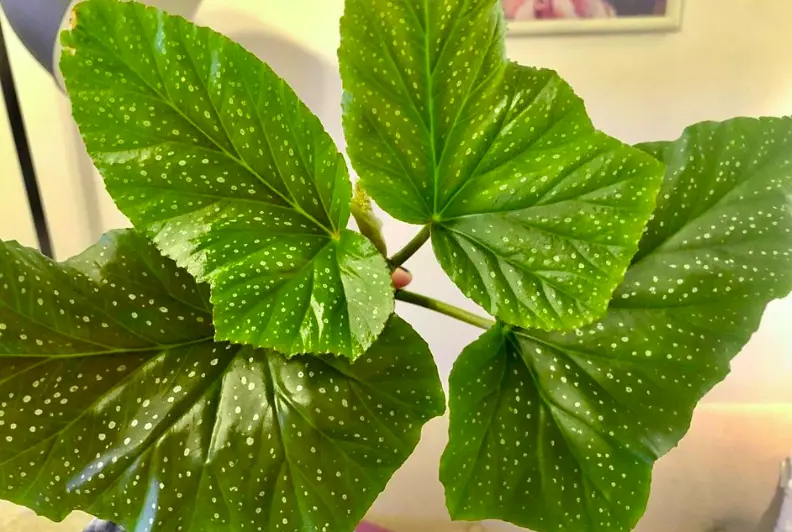
An example of this type of begonia is Angel wings begonia. It has conveniently placed nodes that allow you to take cuttings from the stem.
All you have to do is to make a 2-inch cut just below a node and ensure that the cutting has some leaves still attached.
Depending on you, you can grow your cutting using the soil or water method. It is important to note that cane begonias respond more to water propagation.
Leaf Cuttings
For large-leaved plants like begonia rex, propagation can work with a single leaf.
To take a leaf cutting, snip a large, healthy leaf at the point where it meets the stem. Watch out for small spots or tiny insects, so you do not take an already diseased leaf.
Rhizome Cuttings
Taking a rhizome cutting from a rhizomatous begonia is similar to stem cutting, except, in this case, you don’t necessarily need leaves.
To take a rhizome cutting, look for growth nodes that appear as small white lumps.
You can cut your rhizome into 2-inch pieces as long as it has growth nodes. These nodes can grow leaves and roots.
Methods of Propagating Begonias
As you may have gathered already, there are two different methods of propagating begonias.
These methods suit the different types of begonias, so it would be appropriate for you to choose the one that suits your variety.
You should start with more than one cutting, so you might be able to start again if you lose one or two.
1. Water Propagation Method
Water propagation is simple, easy, and efficient. In a short amount of time, you’ve gotten new plants. Here is how it’s done:
First of all, make your cuts. After this is done, remove the lower leaves that might be submerged in water to prevent rot.
You can also cut the larger leaves in half to help the new cutting refocus its energy on growing a root system.
Next, dip your cuttings in the rooting hormone. You can roll the rhizomes in a tray with the powdered rooting hormone or dip the stem.
Now, place your cutting in a glass filled with fresh, clean water as quickly as possible. You do not want it to stay out of water for too long.
Avoid leaving any foliage sitting in the water. Change the water every couple of days to keep pests and diseases from infecting the cutting.
Place the glass or vase containing the cutting in a warm spot and avoid the full sun to prevent sunburn.
The roots would start to grow after 4 to 6 weeks. It might be more, depending on the season and the light received.
After they’ve grown longer, pot the new plant in a rich, peat moss based soil and keep it moist. Continue to care for it to help it adjust faster, and you will see growth quickly.
2. Soil Propagation Method
The upside of soil propagation is that you would not have to deal with the hassle of the new plant adjusting to the soil after the roots have grown in water.
The problem is that it takes longer to root in the soil. However, if you keep your cuttings happy, they will thrive in the soil. Here’s how to do this:
First, make your cut. You should be quick, straight, and clean no matter what type of cutting you are using.
Next, treat your cuttings with some rooting hormone.
For bulbs and rhizomes, toss them into a bag with a small amount of powder rooting hormone or dip them into the liquid.
For stem cuttings, remove the bottom leaf from the node you cut and dip it into the hormone.
For leaf cuttings, dip the petiole (the part that connects the leaf to its stem) into the rooting hormone.
Next, plant your cuttings about an inch deep in rich, light soil. You can plant stem cuttings in the soil until it is directly underneath the first leaf.
You can stick your leaf in the soil to completely cover the petiole or pin the leaf down to the soil so that the petiole isn’t buried.
If you go with the latter, you can make tiny cuts in each leaf vein and pin them down to the soil to encourage growth from multiple spots.
Once your cuttings are set, moisten the soil and move them to a warm area, like on a windowsill. Never let the soil dry.
Depending on the amount of light supplied, the roots can take up to 2 months to develop or longer.
When you see a small plant, complete with leaves, start to grow, you’ll know that it has grown a root system enough to sustain itself.
After your new begonias have grown enough roots to survive, repot them into a new pot with more room. This would trigger a growth spurt.
Bonus: How to Grow Begonias from Seeds
Begonias can be grown from seed at home. It can get extremely tricky, but it would be a fun project for you to try out with your family.
Sprinkle your seeds onto sterile soil in a seedling tray. You can press them down gently, but try not to bury them.
Place the tray in a warm and humid environment. Water gently to prevent the seeds from jumping everywhere, given their size.
Be patient, and you will see your plant to germinate and grow. When you see leaf growth, it is time to separate and transplant them.
As you can see, there are different simple ways to propagate begonias. Whether you want to start a new garden or save an old plant, there is something you can do.
Now it is time to use your newly acquired knowledge and show off your green thumb while saving money.